
Machining & Assembly · Component review guide · Litian Yunde
AI-generated explanatory concept; not a Litian Yunde product photograph or a validated design.
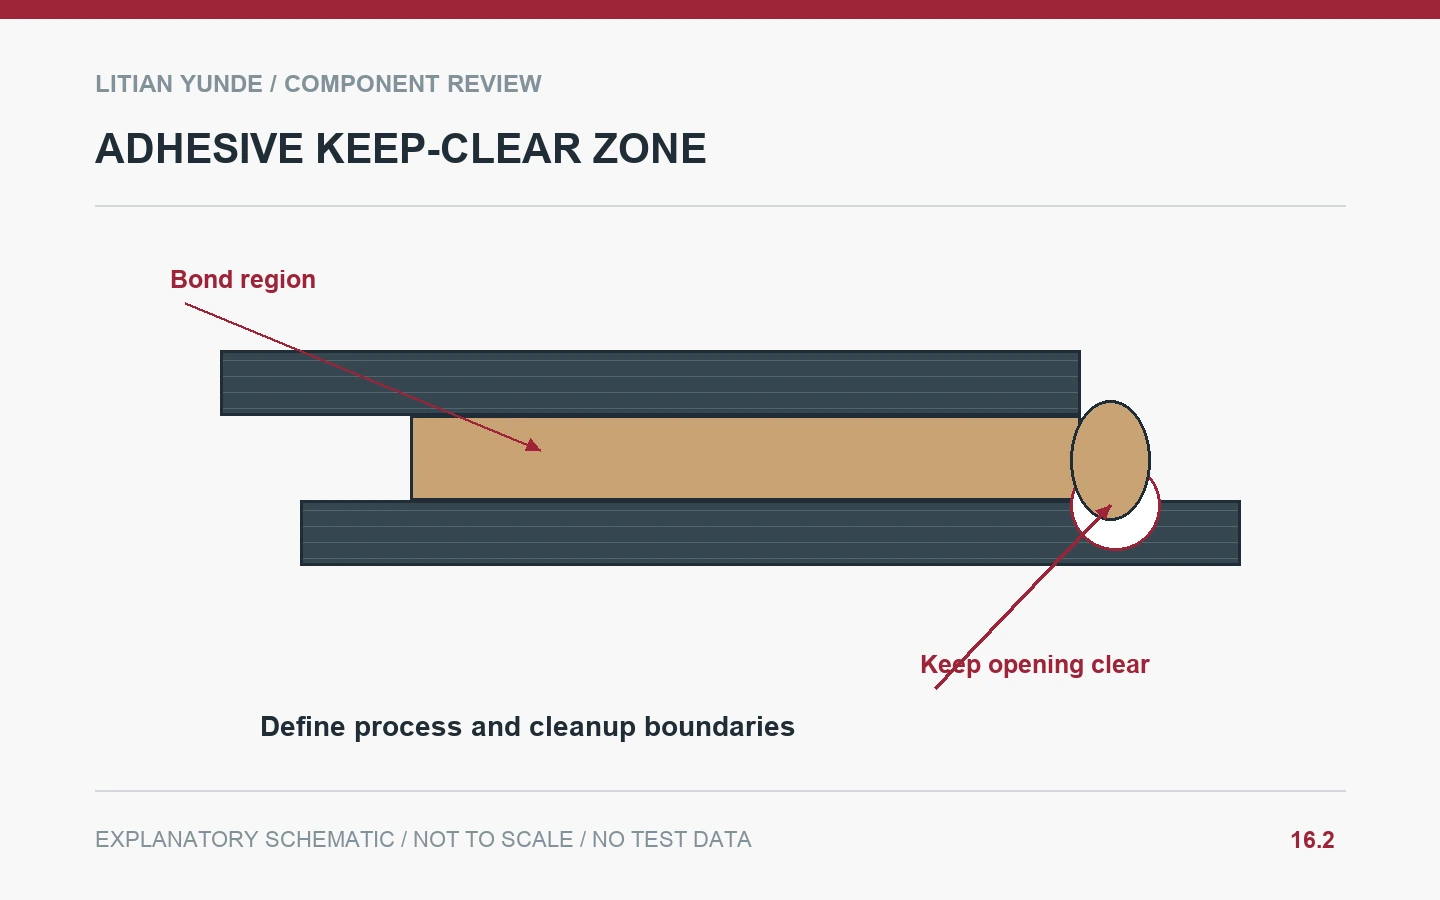
Adhesive displaced during assembly can reach holes, visible surfaces or service interfaces. Define where squeeze-out is permitted, where surfaces must remain clear and how excess adhesive is handled. A neat external bead does not prove the internal bond is sound, and uncontrolled cleanup can disturb the agreed bonding process.
Locate the neighbouring functional surfaces
Show the bond region together with nearby threads, holes, connector seats, sliding surfaces and visible areas. Identify the keep-clear boundaries on a controlled view. A bond drawn alone can hide the features affected by displaced adhesive. Include the actual assembly position and any fixture contact that could spread it. Clarify whether an external fillet is required, permitted or restricted; do not infer its acceptance from appearance.
Use the adhesive supplier’s process instructions
The appropriate application, cure and cleanup method depends on the selected adhesive and substrate preparation. Record the controlled product and process instructions. Avoid prescribing an arbitrary solvent, scraping method or cure schedule from a generic web article. If masking is proposed, review its compatibility and removal stage. Changes made to protect appearance should not quietly change the bond geometry or contaminate a surface intended for adhesion.
Check clearances as well as the bond record
Inspect the keep-clear zones at the specified stage and confirm that relevant hardware or service functions remain usable. Record findings before approved cleanup or rework. Bond acceptance needs the agreed evidence for the project, which may include process records or defined validation. A visible bead, the absence of a bead and a successful assembled fit each describe different observations; none alone should become an unrestricted strength claim.
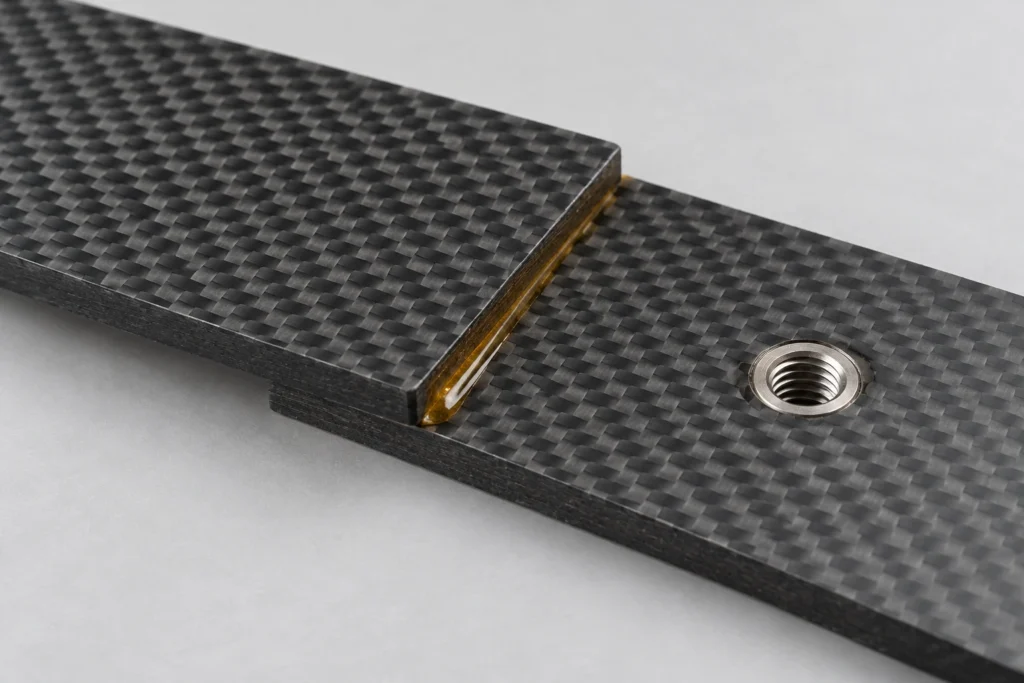
Example: excess adhesive near a threaded insert
A mounting foot is bonded close to a threaded insert. The sample reveals adhesive at the insert opening. The project marks a keep-clear region and agrees the application and cleanup steps with the adhesive process owner. The inspection records both the insert usability and the bond’s required evidence.
Illustrative scenario, not a customer case or reported production result.
Details to agree before ordering
| Review item | Record to agree |
|---|---|
| Map | Bond boundary and nearby functional features. |
| Limits | Permitted bead and keep-clear zones. |
| Process | Selected adhesive and approved cleanup stage. |
| Evidence | Original finding, disposition and separate bond acceptance. |
Questions buyers ask
Does an external adhesive bead show the full internal bond?
No. It is a surface observation whose meaning must stay within the agreed inspection scope.
Can excess adhesive always be cleaned with solvent?
Use the selected product’s approved instructions; a generic solvent recommendation is insufficient.
Technical background and related reading
Background resource: WEST SYSTEM: Surface Preparation. Background reading only; the project checklist is editorial guidance, and this reference does not establish supplier certification or part approval.
- Carbon Fiber Bonded Joints: Control Overlap and Bondline Geometry
- Carbon Fiber Shell Flanges: Check Access to the Back of the Fastener
- Browse the carbon fiber knowledge centre
Review your component with Litian Yunde
Share the drawing revision, intended application and the interface or inspection question you need to resolve. The quoted construction and acceptance requirements are confirmed for the specific project.